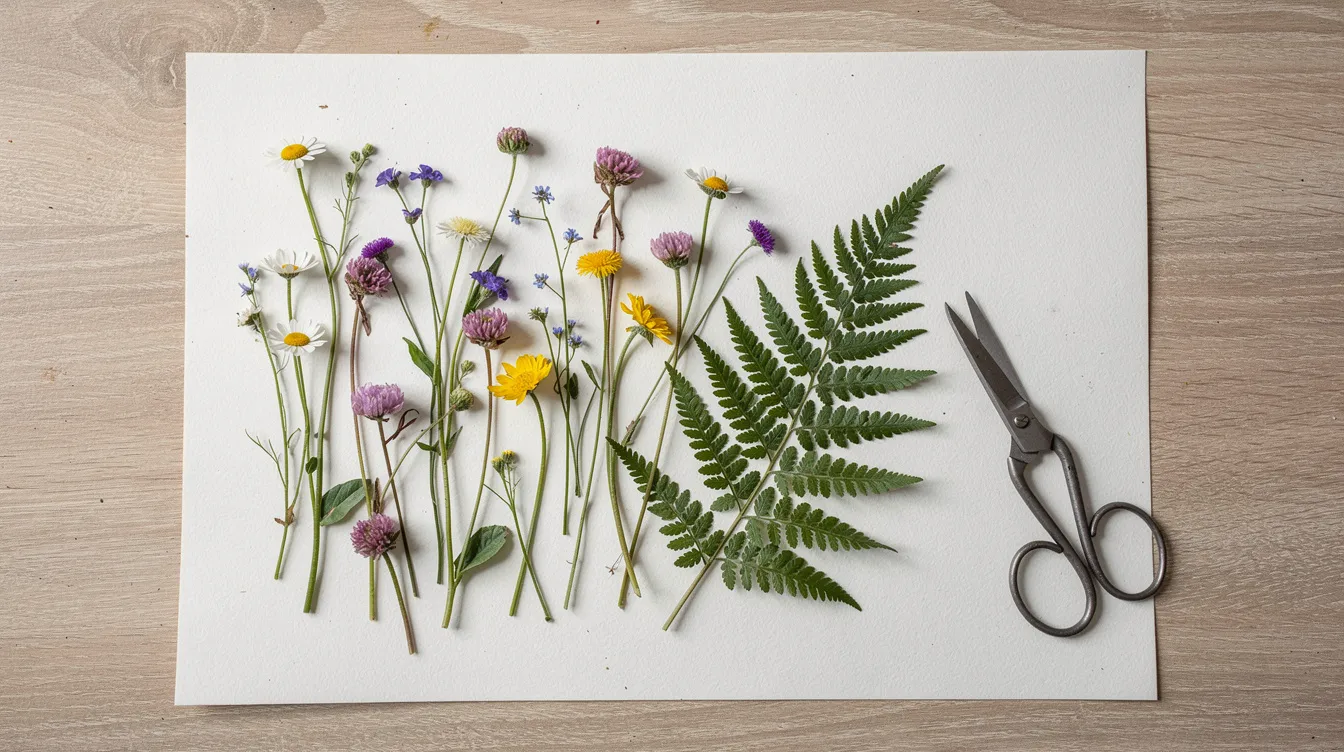
I press flowers on my kitchen table using four simple methods, and I tape the results into the nature journal I keep in my mail van. Here is everything I have learned in six years of doing it.
Why I Press Flowers in the First Place
In 2018 I found a shoebox of my grandmother’s pressed ferns under a bed. Each one was taped to a card with a date and a place in her small handwriting. Some of those ferns were decades old and still green at the edges. I tried to draw one at the kitchen table, did it badly, and the next day I picked a fern from a fence line on my mail route and tried to press it myself. I have not really stopped.
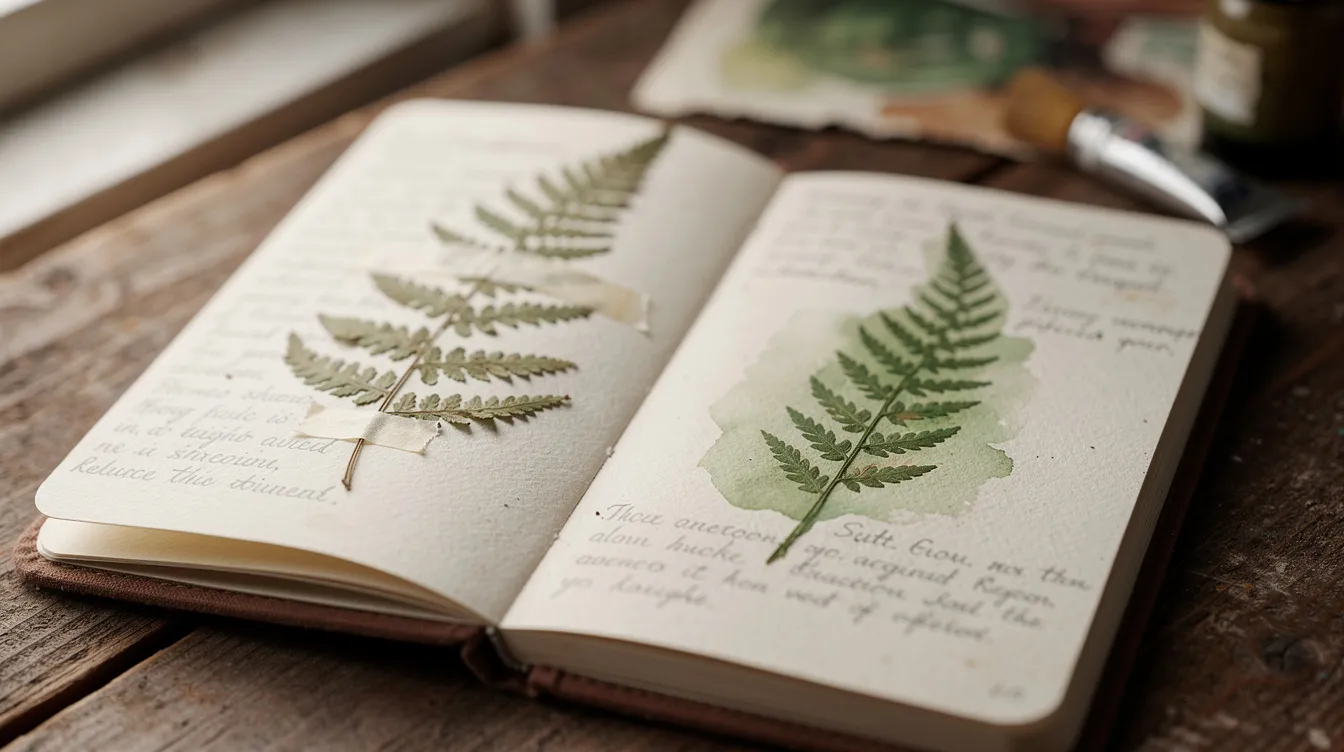
A drawing records how a flower looked to me, with all the choices I make about color and line. A pressed flower records the flower itself, with its real pigment, odd kinks, and overlapping petals. I often paint a quick study in watercolor, press a sibling bloom from the same plant, and tape it on the opposite page. Together they tell a fuller story than either one alone. Pressing flowers locks in color and shape for crafts or art, and properly stored pressed flowers can last for hundreds of years. That is not an exaggeration. Botanists have kept pressed, dried plants in collections called herbaria since at least the 1500s, when Luca Ghini at the University of Bologna began flattening plants under pressure and mounting them on paper. The flatten, dry, label method he used is essentially the same one I use on my kitchen table, just without the Latin. If you want greens that look right next to a pressed leaf, I explain my approach in mixing greens for leaves in watercolor. If you want to learn to draw these blooms alongside pressing them, I have a list of online colored pencil courses that suit botanical work.
This is a hobby blog called Fern and Pencil, not a shop, and I sell nothing. What follows are four methods I actually use, mistakes and mishaps included:
-
Method 1: Pressing flowers in a heavy book with more heavy books on top
-
Method 2: A DIY wooden press made from scrap pine boards
-
Method 3: A microwave flower press for faster results
-
Method 4: A household iron when I am in a real hurry
Before You Start: Picking and Preparing the Best Flowers
The flower you choose matters more than the press you use. I have lost whole batches to a wet morning on the route, because damp flowers go brown and moldy before they ever dry. Humidity can cause mold in pressed flowers faster than you would think, so start dry and stay dry. For the note-taking side of this, read writing nature observations in your journal.
-
When to pick flowers: On a dry day after the dew has lifted, which for me means mid-morning or later. My growing season runs roughly October to April here in Nelson, New Zealand, but the same rule holds anywhere. Pick flowers that are fully open and blemish-free for the best results.
-
The best flowers for pressing have a single layer of petals and are naturally flat. Choose flowers like pansies, violas, cosmos, buttercups, forget-me-nots, and small daisies. Fern fronds, leaves, and grasses press wonderfully too and are less fussy than most blooms. Pressing native wildflowers like clarkia yields great results as well. Choose flat, single-layered blooms for pressing whenever you can.
-
Thicker flowers like small roses or gerberas can work if you slice them in half lengthwise and press the cut side down. Very fleshy flowers such as begonias and succulents usually fail. Avoid flowers with fleshy, water-rich petals and avoid thick blooms that hold moisture. Peonies and other full, layered blooms need deconstructing into individual petals first.
-
Prep your cuttings: Remove damaged petals, blot any extra moisture with a tissue, trim thick stems, and gently flatten curved petals with your fingers. Pick a few extras, because some always fail.
-
Take notes while standing there. Scribble the date, location, weather, and which insects were visiting on a scrap of paper and slip it into the bag with the cutting. Pressed flowers lose their stories fast, and remembering which yellow petal came from which fence post is hopeless a week later. Those field notes become journal entries later. Choose flowers that retain their color best when pressed, and write down the original color while you can still see it.
-
Respect the patch: Pick only where it is allowed, start with roadside weeds and garden plants, and take only a few stems from any one spot. Never strip a wild patch bare.
Paper, Card, and Other Simple Supplies
You do not need fancy gear. My first presses used junk mail, cereal box cardboard, and heavy books from a charity shop.
-
Absorbent paper: Plain printer paper, unprinted newsprint, coffee filters, or blotting paper (ideal, around 150 to 200 gsm). Avoid glossy paper entirely. Avoid textured or quilted paper towels because they emboss patterns onto thin petals. Do not use newspaper with strong ink, because it can transfer print onto your specimen. Other absorbent paper like plain brown wrapping paper works in a pinch.
-
Liners: A sheet of baking parchment paper or thin copy paper laid directly against delicate petals stops them sticking to the absorbent layer. Use parchment paper to avoid imprints on flowers.
-
Cardboard layers: Corrugated cardboard or thick card between absorbent sheets helps air circulation in both book and wood press setups. Cut two pieces of cardboard for each layer.
-
Useful extras: Small scissors or snips, tweezers for handling delicate dried flowers, a pencil for labeling, and a zip bag or old envelope for carrying cuttings from the field. All of this lives in my glovebox kit. Cut everything to one sheet size so paper, card, and liners move easily between a book, a wooden press, or a microwave press.
Method 1: Pressing Flowers in a Book with Heavy Books on Top
This was my first method and it is still the one I recommend if you are just starting. I used an old atlas and a stack of heavy books on the kitchen table. The classic book method is best for beginners because it needs nothing you do not already own.
-
Why book pressing works: Slow, gentle pressure and dry paper gradually pull moisture from the petals. It is the cheapest way to start and perfect for a handful of blooms.
-
Drying time: Press flowers between pages of a book for 2 to 4 weeks for thin flowers. Sometimes up to six weeks for thicker specimens, depending on humidity in your house.
-
Pros: No tools, no cost, works well for book pressed flowers that need to be flat and stable. Great color retention if you are patient.
-
Cons: Risk of browning or mold if the air is damp, and the tower must stay undisturbed. I lost a whole page of forget-me-nots by lifting the paper to peek too early and tearing the petals. Resist the urge.
How to Prepare and Place Flowers in a Book
-
Choose a large, dry book with non-glossy pages, such as an encyclopedia, old phone directory, or atlas.
-
Open the book, lay one sheet of absorbent paper on the page, then place flowers face down with their most dramatic flat bloom showing. A half-flower can go cut side down for a side-on look.
-
Spread petals gently with a fingertip or tweezers. Leave at least two centimetres between blooms so they never touch or fuse. Group similar flowers on the same page and arrange them in a single layer.
-
Cover with another sheet of paper and close the book carefully so nothing shifts. Label the page edge with a sticky note showing the plant name and start date.
Drying Time and Checking Your Dried Flowers
-
Add weight: stack several heavy books or a brick on top, especially in the first week. Keep the stack somewhere dry, out of direct sun, and away from a damp bathroom.
-
Realistic ranges: thin wildflowers 10 to 14 days, thicker garden flowers three to four weeks. Swap damp paper for dry after about three days to prevent browning and mold.
-
To check, open the book slowly and test a petal. Layer flowers between absorbent paper and weighted materials, and wait until the petal feels paper-thin and crisp, not cool or flexible. If it is still soft, give it another week. The flower should be completely dry before you remove it.
-
Common problems: browning edges if the book is too warm, pale mold spots if the environment is damp. Store finished dried flowers in a labeled envelope or between clean paper sheets until you are ready to use them.
Method 2: Making and Using a DIY Wooden Press
In 2020 I made a simple DIY wooden press from leftover pine boards in the shed. It took an afternoon and cost me almost nothing beyond some bolts and washers.
-
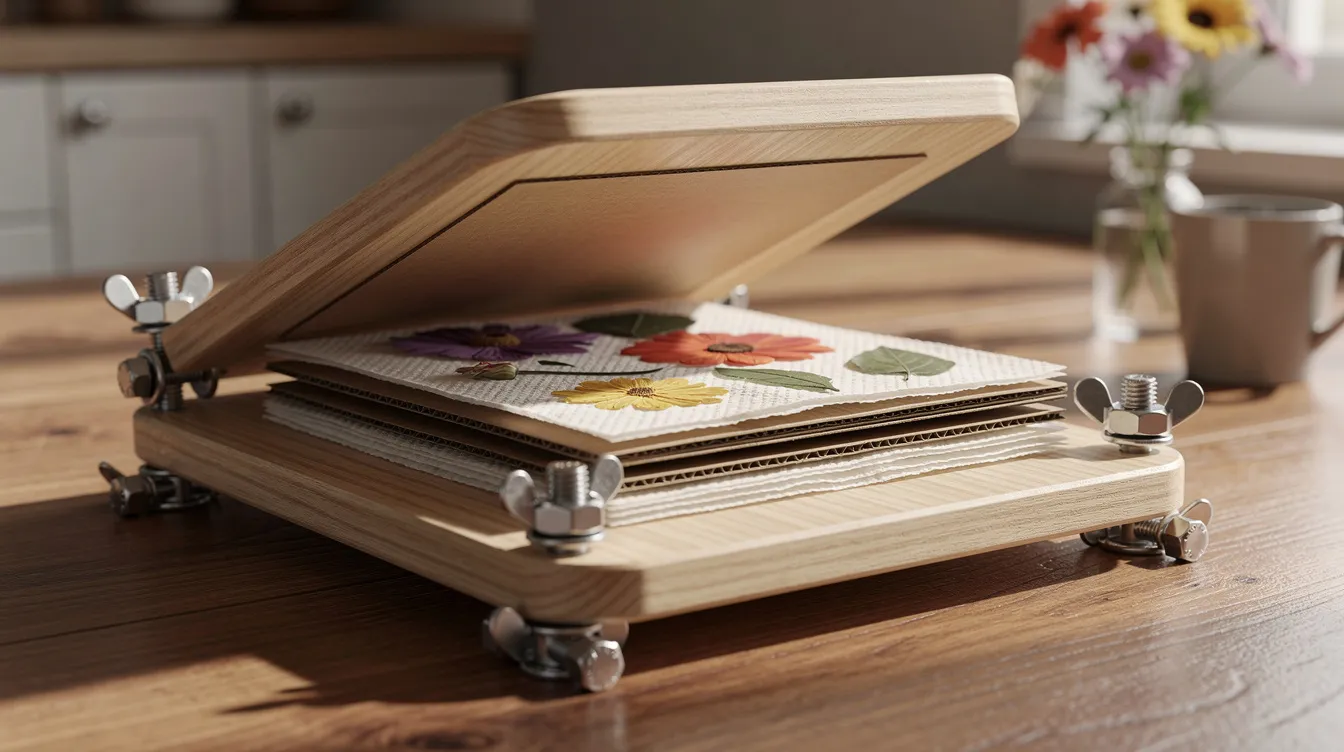
What it is: Two wooden plates tightened together to apply even pressure. Wooden presses provide even pressure for better results than stacking books, and the press is ideal for pressing many plant specimens at once for a nature journal or small herbarium.
-
Typical size and cost: Two 20 x 20 cm boards, four 6 mm bolts, wing nuts, washers, and scrap cardboard. Under ten dollars if you have the wood already.
-
Advantages over books: More even pressure, no risk to your favorite atlas, and much easier to swap damp papers without disturbing other flowers.
Building a Simple DIY Wooden Flower Press
-
Cut or buy two square boards of the same size and sand the edges smooth so they do not snag paper.
-
Mark and drill four holes two to three centimetres in from each corner so they line up exactly. Tighten bolts in opposite directions to test alignment.
-
Hardware: bolts long enough to pass through both boards and a stack of layered specimens, with washers and wing nuts for hand tightening. No tools needed after the build.
-
Cut cardboard and absorbent paper to fit inside without covering the bolt holes. Seal or paint the outside of the wood if you like, but keep the inside bare so it breathes.
Layering Flowers and Drying in a Wooden Press
-
The sandwich order: board, cardboard, paper, flowers, paper, cardboard, repeated in layers. Place flowers face down or as you want them to appear, with space between blooms. Lay each flower flat with petals spread.
-
Tighten all four wing nuts evenly, then set the press in a dry, airy place out of direct sun.
-
Drying takes about two to four weeks, similar to the book method, but results are usually slightly flatter with better color.
-
Open after a week to replace damp paper, then retighten. The wood press can hold many layers at once, which is handy when the garden is in full bloom.
Method 3: Using a Microwave Flower Press for Faster Results
On a rainy Sunday last year I tried a microwave flower press for the first time and was surprised to get usable pressed flowers in under ten minutes. Using a microwave press can dry flowers in minutes, which still seems like a trick.
-
What it is: Two rigid plates (ceramic or similar) with a fabric liner and absorbent paper between them, strapped together so it is microwave safe. Commercial versions like the Microfleur Max are popular, or you can use two clean terracotta tiles with cotton liners.
-
Best for: Impatient hobbyists, last-minute greeting cards, and testing new plants without tying up a book or wood press for weeks.
-
The catch: Timing is fussy. Some flowers scorch or brown easily. Expect trial and error, and keep notes on times and results for other methods you try later. Microwave pressing can dry flowers in just minutes, but those minutes matter.
How to Place Flowers and Run the Microwave Cycles
-
Lay a fabric liner, then absorbent paper, then flowers arranged carefully in their final shape, because they dry more or less frozen in that position. Arrange blooms so similar flowers sit together; do not mix thick stems with thin petals.
-
Close the press firmly with straps or clips and set it on a clean turntable.
-
Starting times: one 20 to 30 second burst at medium power, check, then 10-second bursts as needed. Lift the press out between bursts to let steam escape and let the flowers cool. This venting step is what keeps petals from cooking. Turn off any steam settings if your microwave has them.
-
Every microwave is different, so adjust for yours. Lower wattage ovens need slightly longer bursts. Stop when petals feel papery, not brittle.
Which Flowers Cope Best with Microwave Pressing
-
Do well: calendula, small daisies, pansies, violas, hardy wildflowers with not-too-thick centers. Flowers with a single layer of petals are easiest to press in any method, and they cope especially well with heat.
-
Often brown: very pale or white petals (they yellow quickly), and fleshy flowers like begonias and succulents.
-
Test one or two sample blooms before committing a special collection. Color retention can be excellent when timing is right, making this the preferred method for bright flower art and quick craft project pieces.
Method 4: Pressing Flowers with an Iron When You Are in a Hurry
This is my least-used method, but it is handy for emergency greeting cards or when a flower will wilt before I get home from the route. Ironing flowers can lead to uneven drying and browning if you are not careful, so I treat it as a rough first step rather than a finished technique.
-
The idea: Flatten and partly dry flowers between layers of paper using a household iron on low heat. Results can be a little crinkled and color is not as good as with a book or wooden press, but it is much faster than waiting weeks.
-
Safety: Turn off steam settings completely and never iron directly on plant material. Always use parchment paper or plain absorbent paper as a barrier.
-
Best for: Quick experiments, other flowers you just want to test, and small flat blooms that are already nearly dry. Not ideal for roses, peonies, or anything thick.
Step-by-Step Iron Flower Pressing
-
Set up a firm, heat-safe surface with a thin towel, then lay a sheet of plain absorbent paper on top. Arrange flowers face down in a single layer, then cover with a second sheet of paper to create a paper envelope. Place flowers so petals do not overlap.
-
Set the iron to low or medium-low, no steam. Press the iron down for 10 to 20 seconds at a time without sliding.
-
Lift to check and repeat until mostly dry, then finish with a week in a book or wooden press for flatter, longer-lasting results.
-
If petals stick, let everything cool fully and then lift them with tweezers. Use wax paper only as an outer protective layer, never as the primary absorbent layer against petals.
Paper instructions for ironing are simple, but the technique takes a few tries to get right. Keep your early attempts as test notes rather than expecting perfection.
Which Method Is Best for Flower Pressing?
The best way to press flowers depends on your time, your tools, and what the dried flowers are for. Here is my personal ranking after trying all four methods over six years.
-
Book method: Slowest, cheapest, flattest results. Best for beginners and for blooms you care about. Good color retention with patience.
-
DIY wooden press: My preferred method for most journal specimens. Even pressure, easy paper swaps, and handles many layers at once.
-
Microwave flower press: Fastest and often surprisingly vivid. Best for quick pressed flower art, color-rich petals, and testing whether a new plant specimen is worth pressing in bulk.
-
Iron: Fastest setup, least consistent results. I reach for it only in a pinch. Good for greeting cards, less reliable for anything I want to frame.
Rule of thumb: slow methods for memory blooms you care deeply about, fast methods for experiments and everyday craft flowers. If you cannot decide, the book method costs nothing and teaches you the most about how different flowers behave.
How Long Does It Take to Press Flowers?
Minutes for microwave and iron, weeks for books and wooden presses.
-
Book and wooden press: Two to four weeks for thin flowers, up to six weeks for thicker ones.
-
Microwave flower press: Three to eight minutes including pauses and venting. Some blooms need a rest period of several hours after microwaving to air dry completely.
-
Iron: Roughly 10 minutes of active pressing, plus optional extra drying time in a book.
-
Factors that change drying time: Petal thickness, ambient humidity, how often you change absorbent paper, and how tightly you clamp the press.
-
Test by touch: A properly dried flower feels crisp and room temperature, not cool or flexible. If any spot feels soft, it is not done.
Storing Your Dried Flowers Safely
Dried flowers are fragile. I snapped plenty by storing them badly in the early days, stacking loose petals in a drawer and wondering why they crumbled.
-
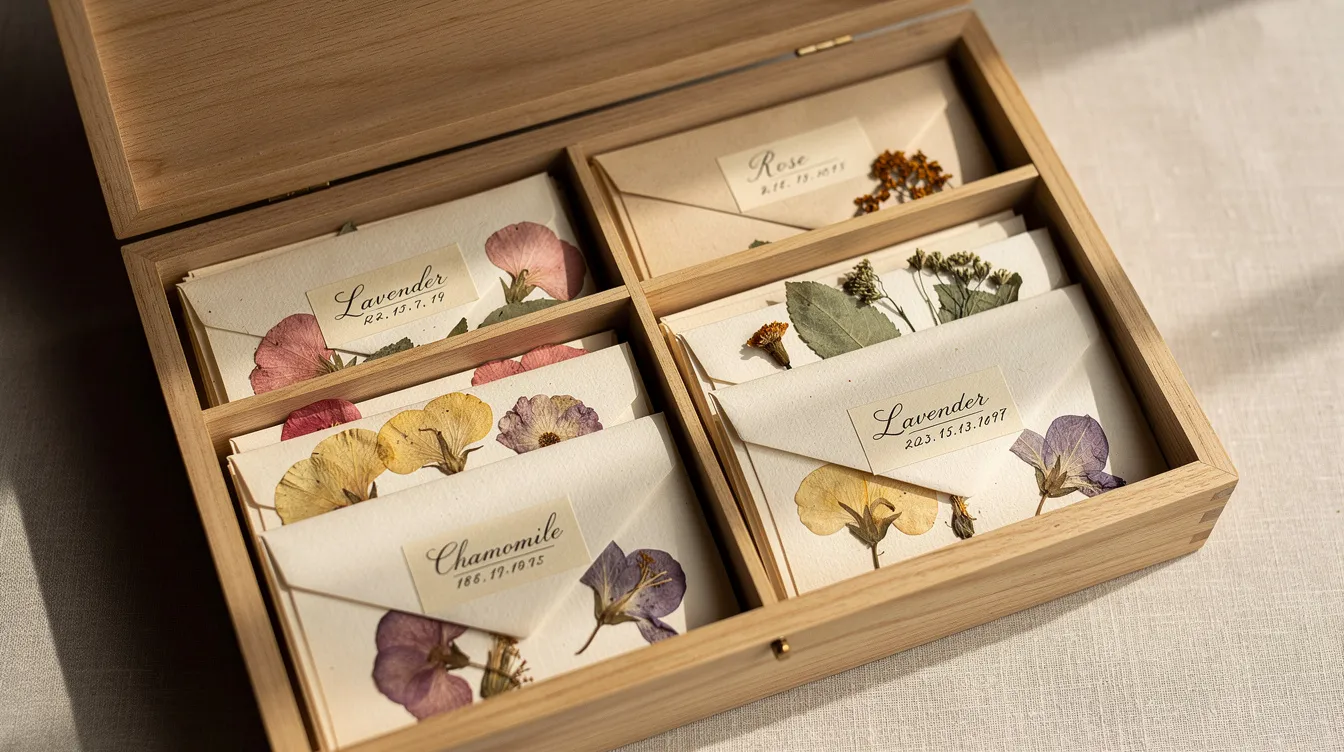
Store between two sheets of clean absorbent paper in an envelope, or in a shallow box with paper between tiers. Store pressed flowers in a sealed dry environment away from movement and dust.
-
Label each packet with plant name, place, and date so it doubles as a record for a journal or informal herbarium. This is essentially what professional herbarium collections do, just on a smaller kitchen-table scale.
-
Store pressed flowers in a cool, dry, dark location. UV light can fade pressed flower colors over time, especially yellows and blues. In my experience, reds and purples hold color far better. Keep the finished journal out of bright light if you want to preserve the vibrancy.
-
Handle with tweezers or very dry, clean fingers. A dried plant specimen is stiff but brittle, and a thumbprint of moisture can start a mold spot.
Creative Ways to Use Pressed Flowers in Nature Journals and Home Decor
Most of my pressed flowers end up taped into my journal beside pencil sketches and watercolor washes. I also keep a few small pieces around the house, and occasionally I make greeting cards for friends. Pressed flowers effectively enhance handmade stationery and greeting cards with almost no effort. The craft side has its own traditions, which I touch on in pressed flower craft.
-
Journal mounting, from my own practice: Tiny dots of PVA glue applied with a toothpick (use less than you think). Use glue to mount pressed flowers on card or journal pages. Alternatively, a strip of washi tape across the stem is gentle and easy to undo. For specimens I want to flip over, I glue a glassine pocket to the page so I can see both sides. Use tweezers to handle delicate pressed petals, because even a gentle fingertip can snap a dry edge.
-
Journal pages: Tape a pressed flower beside a quick sketch of the same plant. Add date, place, and weather in pencil or waterproof ink, plus a short note about smell, visiting bees, or why I stopped the van. Press stems and leaves on their own and arrange them with a bloom on the page for a fuller composition.
-
Flower art and home decor: Small framed arrangements, bookmarks, greeting cards, and ferns in a floating glass frame all work beautifully. Floated flowers between glass create a minimalist display that catches light without exposing the specimen to dust. For something more permanent, resin jewelry seals pressed flowers from moisture and wear. Resin preserves flowers by sealing them from moisture, making it a good option for pendants or small keepsakes. Pressed flowers can be used in jewelry and home decor in dozens of creative ways.
-
Memory projects: A pressed flower from wedding bouquets, a first rose from a new garden, or a sprig from a memorable walk on thick paper. These are the pieces I never regret pressing slowly.
This is not a recipe blog, so there are no required recipe ratings to scroll past and no need to review recipe steps. If you want to comment something about your own pressed flower projects or share a journal page, my email is on the about page. I read everything. If you are new to keeping a journal, start with how to begin nature journaling.
Looking After Nature While You Collect Flowers
Pressing flowers should not harm the places we walk through.
-
Pick only common plants, take a tiny fraction of what you see, and avoid protected or conservation areas without permission.
-
Use the informal “one in twenty” idea: if there are only a few plants, leave them alone. If a patch is crowded with dozens, taking one blossom is usually fine.
-
Prefer garden prunings, windfall blooms, and gifted flowers over stripping wild patches. The weeds along my mail route give me more than enough material for a year of journal pages.
Bringing It All Together in Your Own Practice
All four methods work. What matters most is noticing the plants around you and taking the time to press them, even if it is just one fern frond slipped between the pages of an old book.
-
Start with what you have on hand. A heavy book and a few pansies from the garden are enough for a first success. A single fern and a few sentences of field notes make a journal page worth keeping.
-
A simple first project: Press one flower a week for a month using a different method each time, then lay the results side by side in a journal spread and compare. You will quickly find your preferred method.
-
Treat scorched petals and moldy specimens as notes in your experiment, not failures. Write down what went wrong, adjust, and try again next week. That is how a collection grows.
FAQ
How long does it take to press flowers?
Most thin flowers need two to three weeks under weight and thicker ones up to four. Pressing flowers in a book takes 2 to 4 weeks to dry completely. They are done when they feel dry and papery, with no cool, soft spots. The drying time depends on the flower, the humidity, and how often you change the absorbent paper.
Can I press flowers without a flower press?
Yes. A heavy book with newsprint or blotting paper on either side of the flowers works well, with more books stacked on top for weight. This is the book method, and it is how most people start. You do not need to buy anything.
What flowers press best?
The best flowers for pressing have a single layer of petals. Flat, thin-petaled flowers like daisies, violets, forget-me-nots, cosmos, and small ferns give reliably good results. Flowers like pansies and violas are ideal for pressing. Thick or wet flowers like roses and succulents need splitting or slicing first. Avoid flowers with fleshy, water-rich petals like begonias, because they brown before they dry.
How do I stick pressed flowers into a journal?
Tiny dots of PVA glue, a strip of washi tape across the stem, or a glassine pocket glued to the page. Use tweezers because dried flowers are brittle, and a heavy hand will crack them. Less glue is almost always better than more.
Do pressed flowers keep their color?
Some fading is normal over time, with yellows and blues going faster than reds and purples. This is down to pigment chemistry: anthocyanins (the reds and purples) tend to be more stable under drying than carotenoids (the yellows and oranges). Keeping the journal closed and stored out of bright light slows fading considerably. For display pieces you plan to frame, keeping them away from direct sunlight matters more than any other single step.